Alpha Series (A7, A9.2, M9, W9)
Alpha Series Seat Support

Here you can find technical support information for Alpha Series “seat support” parts. On this page you can see descriptions, exploded views, videos & more. If you have questions do not hesitate to contact us, we would like to help you.
Videos
In this section we will add videos that can help you fixing various malfunctions for “Seat support” zone, maintenance videos or other kind of info that can make your velomobile experience great.
Seat install

Seat Selection and Installation
The Alpha 7 comes with four different seat options: XL, S, M, and Airco seat. The S seat is the longest, designed for smaller riders to optimize the center of gravity between the front wheels for improved cornering. This positioning requires a trade-off between headrest comfort and cornering performance. The Airco seat is specifically designed for use with tank steering systems.
Installation Procedure
Begin the installation by placing spacers approximately 3-4mm thick at the lowest point of the seat. Common paint mixing sticks work well for this purpose. Position the spacers at the seat’s lowest point and adjust their placement until the seat sits level.
The seat comes without pre-drilled holes. Apply masking tape to the areas where holes will be drilled for easier marking. Center the seat and secure it firmly with tape to prevent movement during the marking process.
Start by drilling 6mm pilot holes through both the seat and body. Enlarge these holes to 9mm, then use a file to achieve a final diameter of 9.5mm. Precise hole sizing is crucial to prevent screw head slippage.
Hardware Installation
The mounting system uses two M6 screws. One requires modification – grinding an angle on the head. Install the modified screw on the left side, with the ground portion facing the other screw. Protective film, similar to automotive hood protection, should be applied to prevent paint damage.
The right-side mounting uses a standard M6 screw with a bushing. Ensure all hardware is properly tightened for safety.
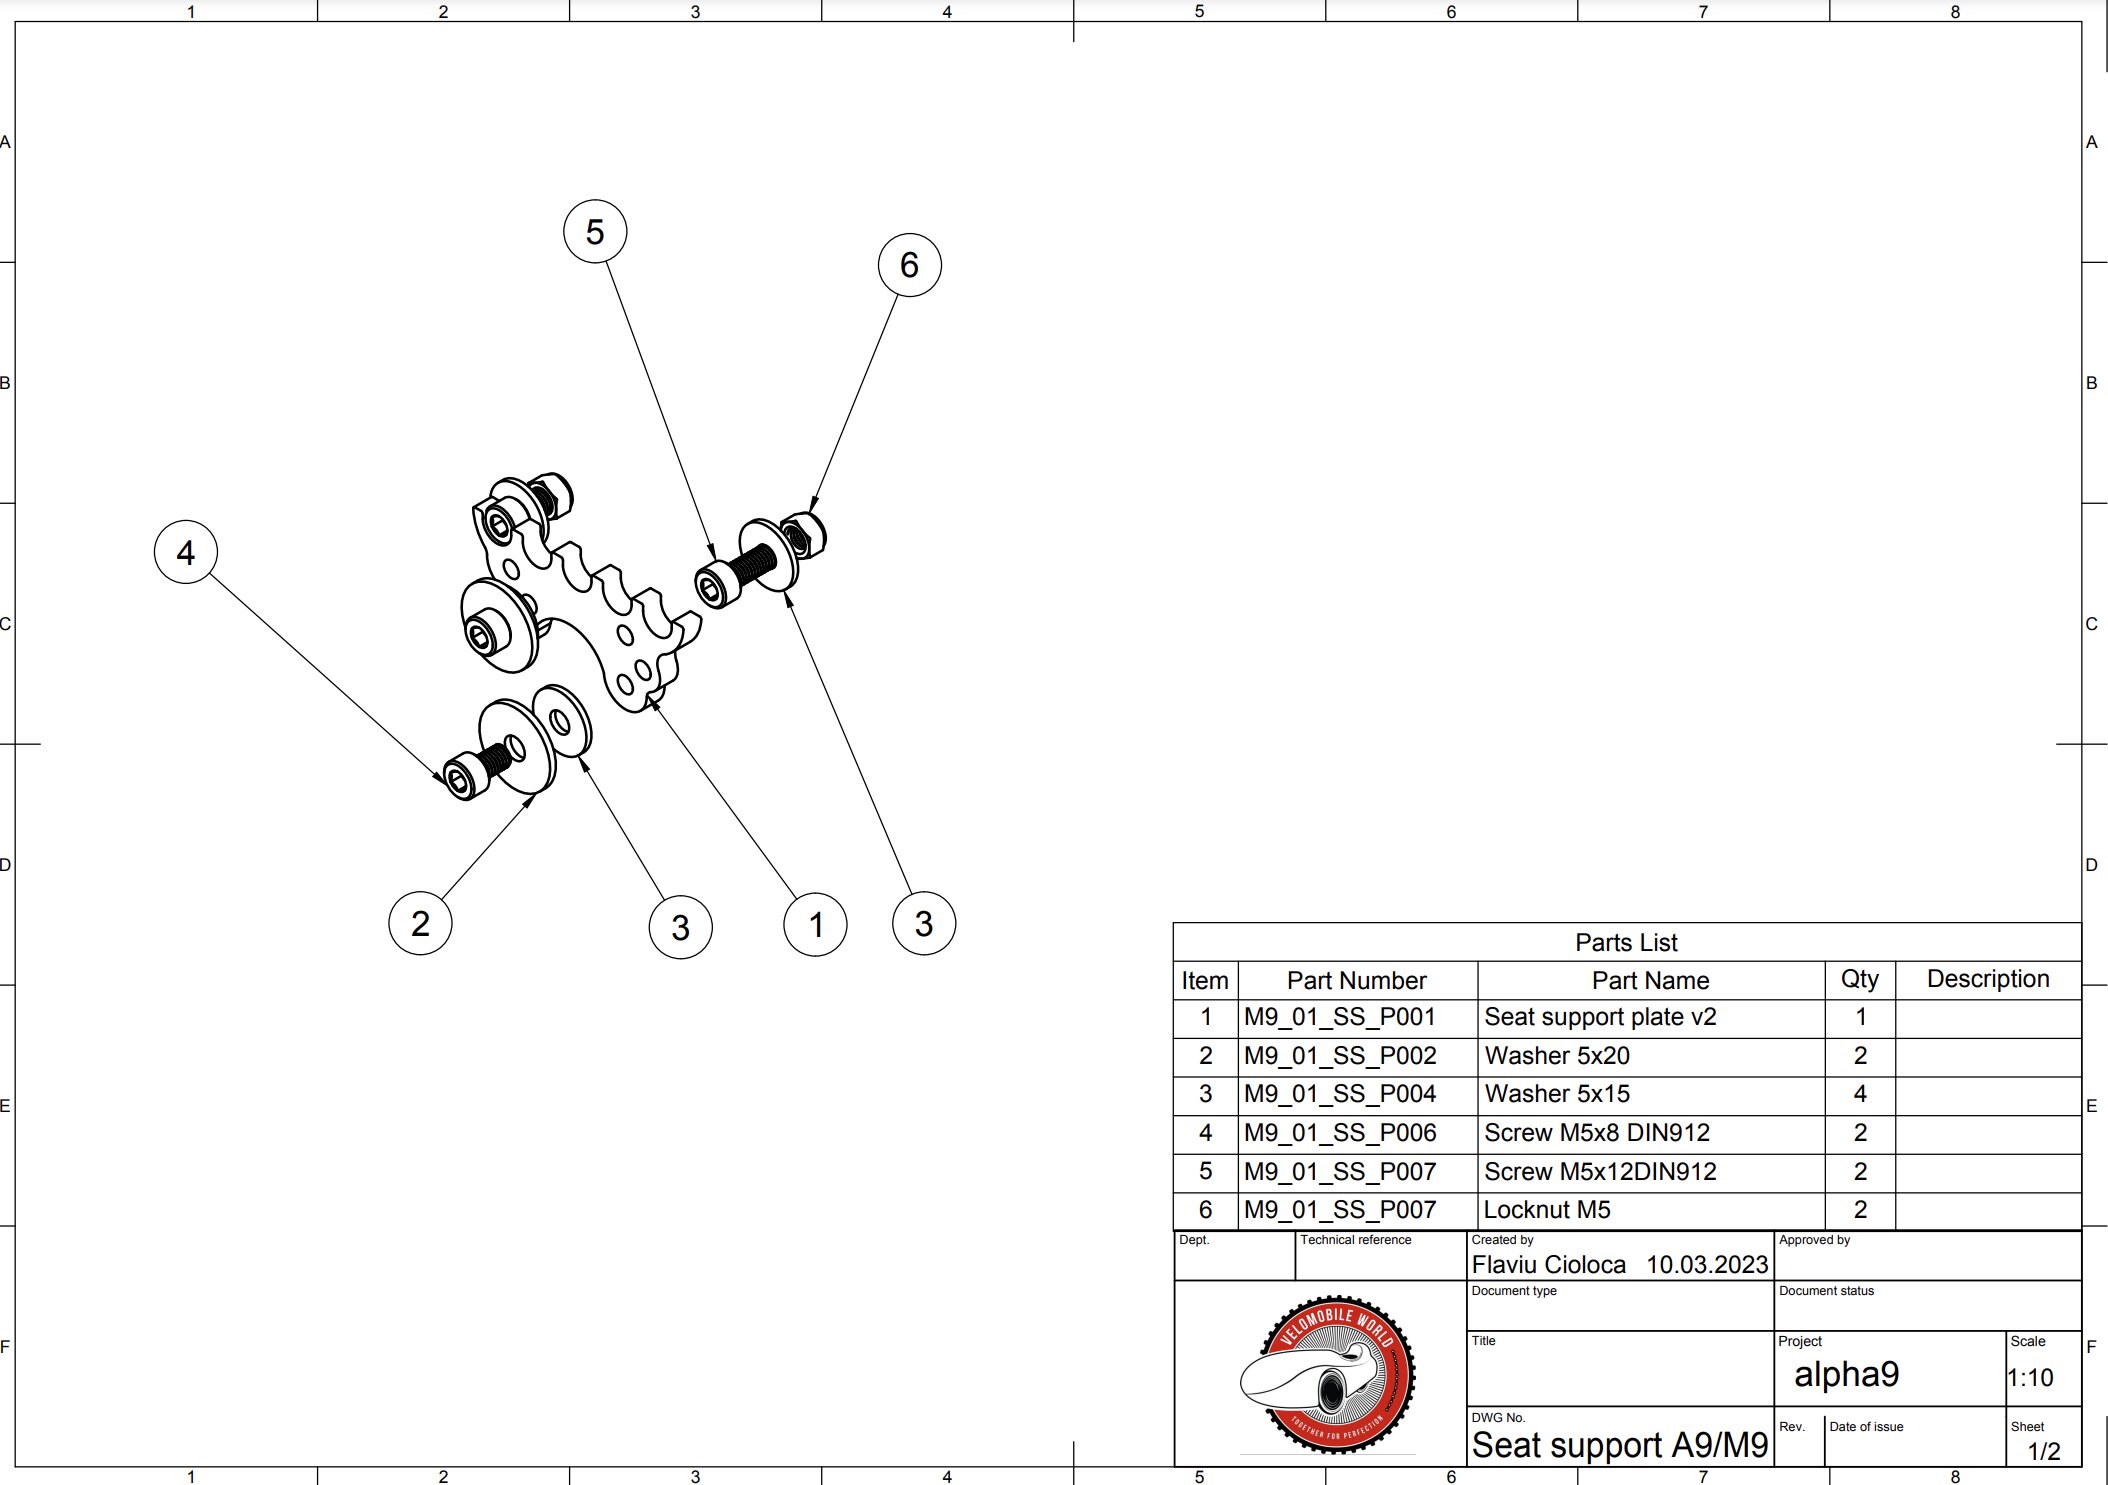
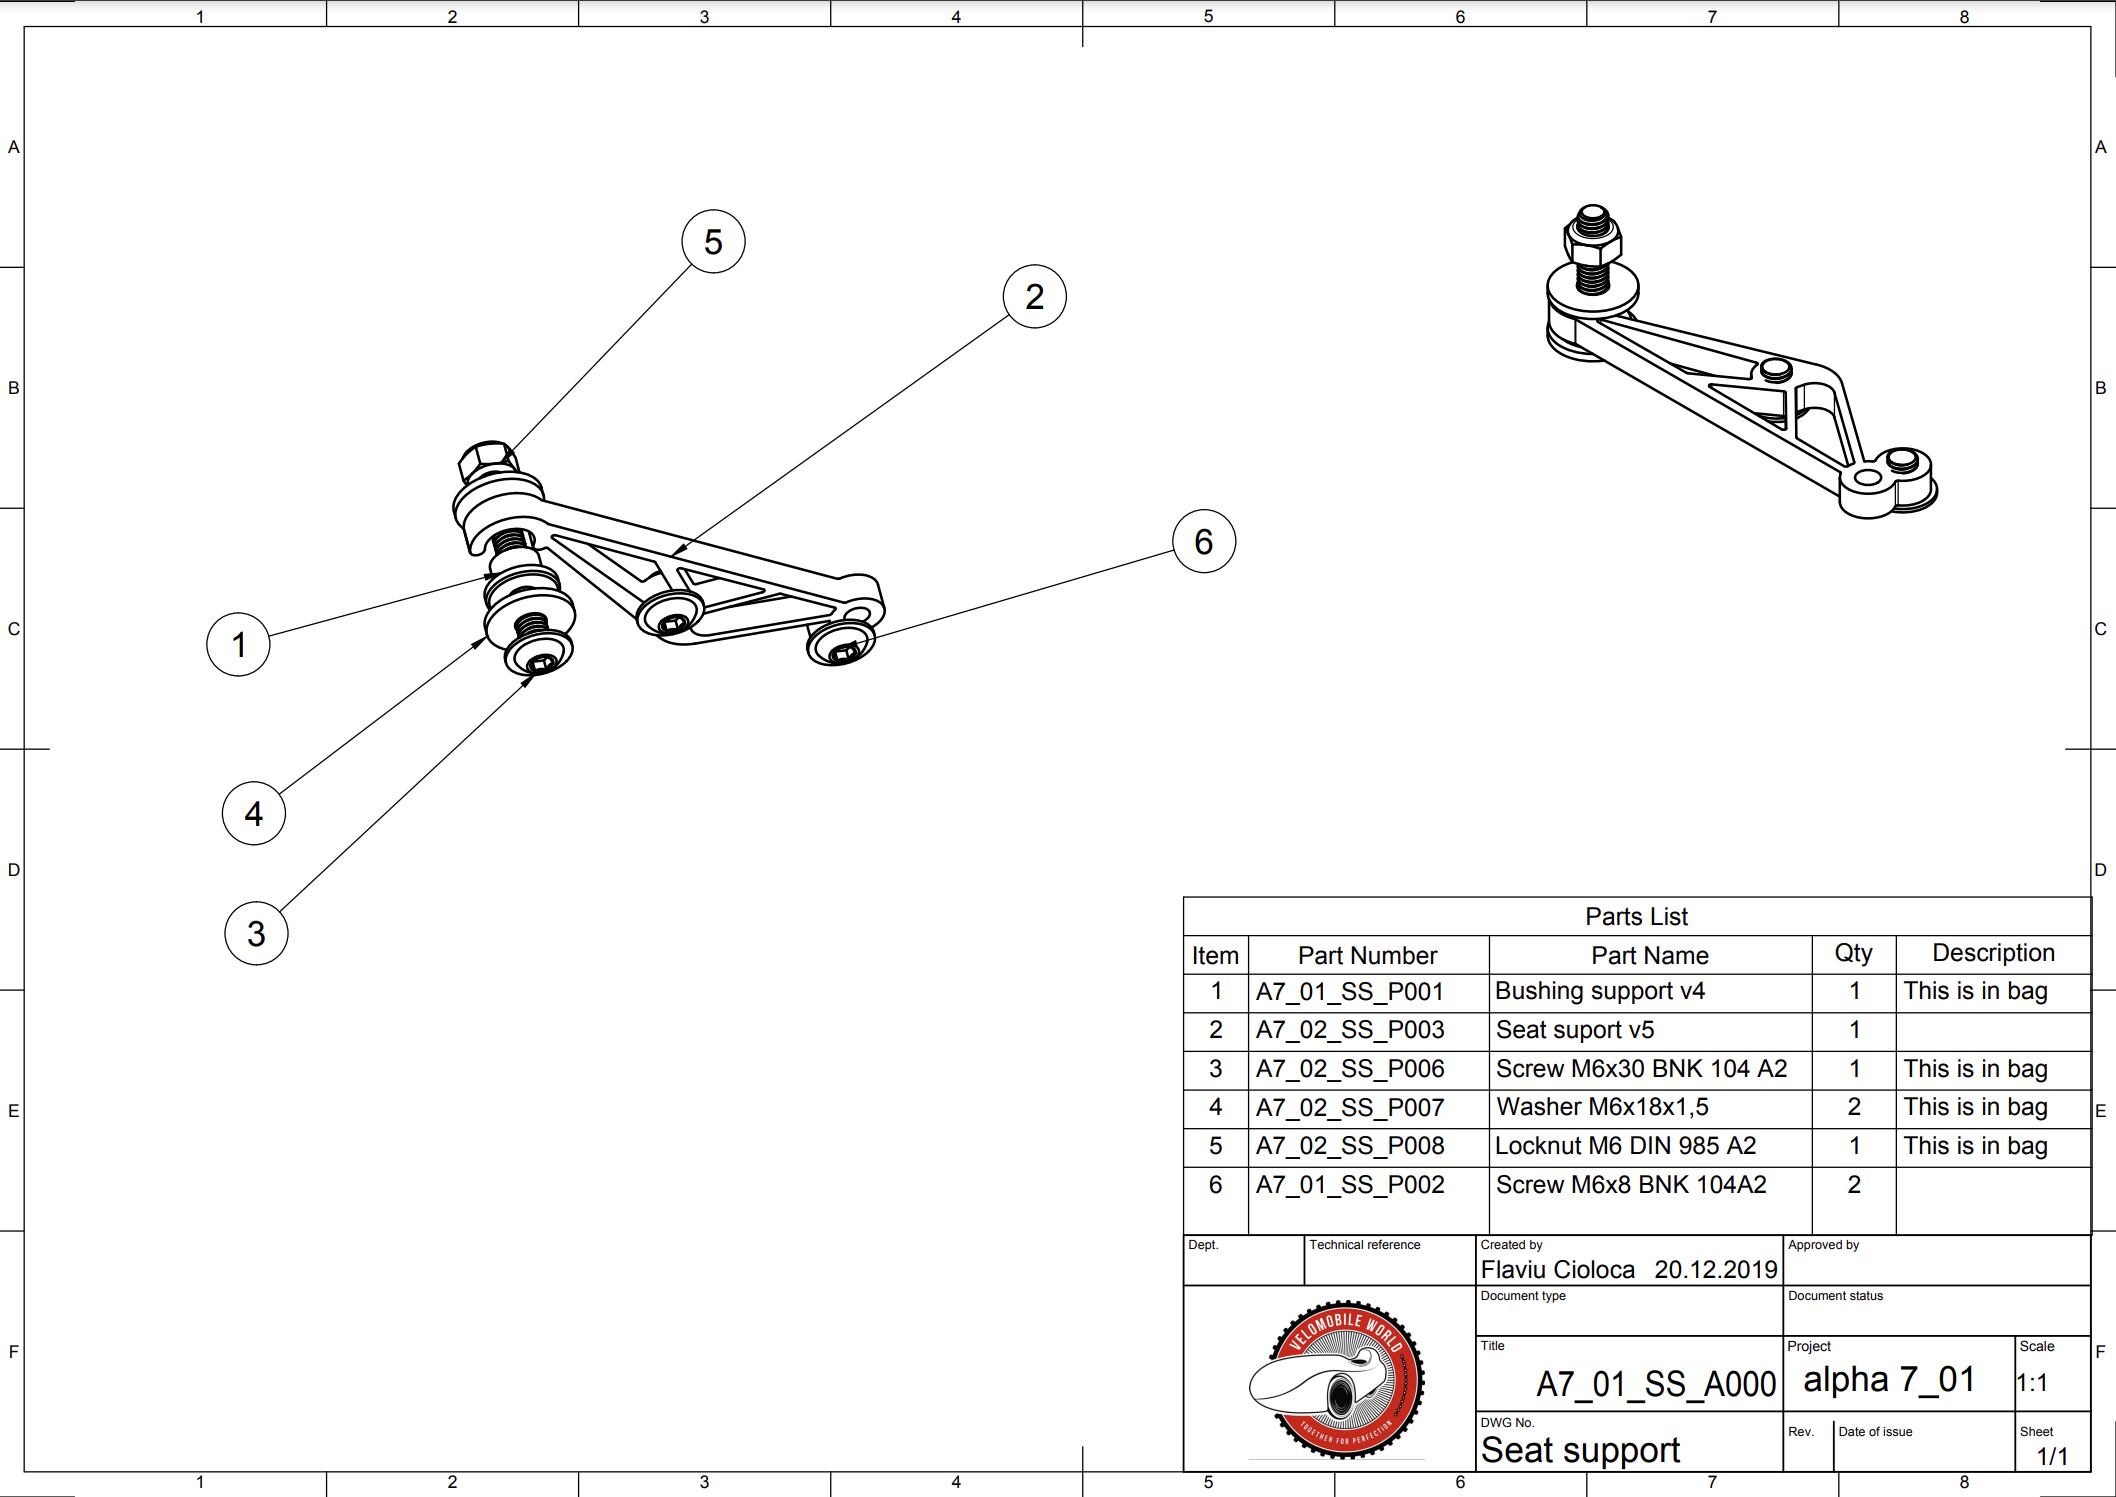
Exploded views
Exploded view drawings can show you the relationship between different components and how they fit together. It helps understand the order of assembly of the different parts. Below you can see different exploded views for “Seat support” zone.

Where you can order parts
You can order velomobile parts from dealers. Search your local or nearest dealer HERE.
Technical specifications and maintenance procedures are subject to updates. Always refer to the latest documentation for current information.
Need assistance? Contact us at sales@velomobileworld.com